Prepare your SD card for use as HardDrive on Emu68 on Linux
Prepare SD card for use as HardDrive on Emu68 on Linux
This tutorial is divided into two parts. The first part is a beginner-friendly guide for Linux newcomers; the second part is for advanced Linux users who are comfortable with command-line tools.
All operations are demonstrated on a Raspberry Pi 5B running Raspberry Pi OS (Trixie), but the steps should apply to any Linux distribution.
Another assumption is, that you have:
- A Raspberry Pi 4 or 5 with microSD, USB, or NVMe storage running Raspberry Pi OS
- Internet connection
- Amiga Kickstart ROM image
- AmigaOS installation media (ADF image, hardfile or directory with AmigaOS)
- Must include HDToolBox
- A microSD card (at least 4GB, preferably 8GB+) and USB card reader
You can even use the Raspberry Pi 4 that you plan to install in a PiStorm later.
Copy Kickstart and installation media to home directory.
Beginner Linux Users
If you are not comfortable with command-line utilities, you can use GUI tools to prepare the microSD card. In a couple of cases the terminal could not be avoided, but these are only few of them.
Installing Required Tools
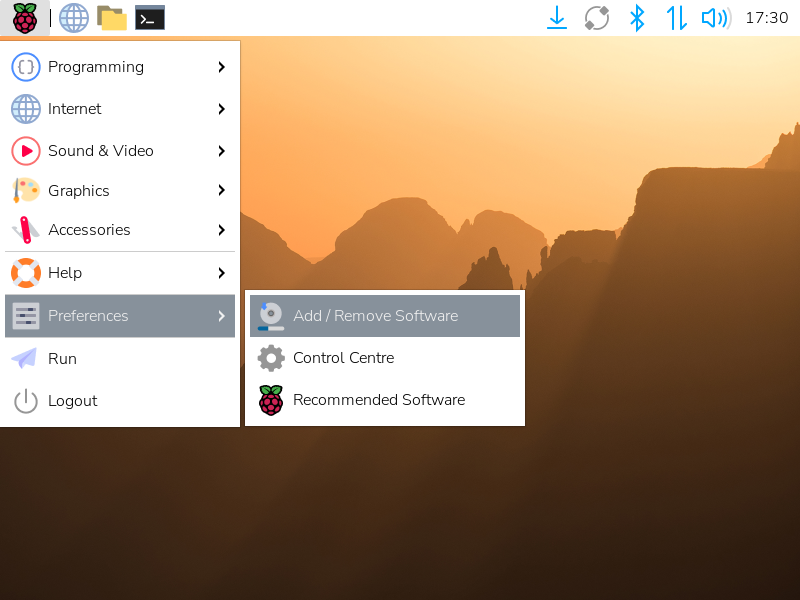
Open the menu and navigate to Preferences → Add / Remove Software.
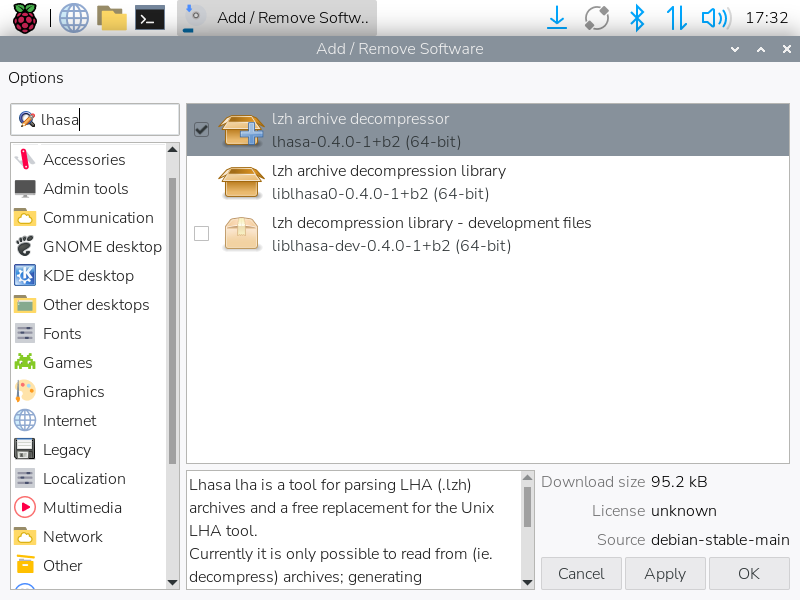
In the search box, type: gparted. Select it to install with the checkbox:

Do the same for lhasa:
And fs-uae:
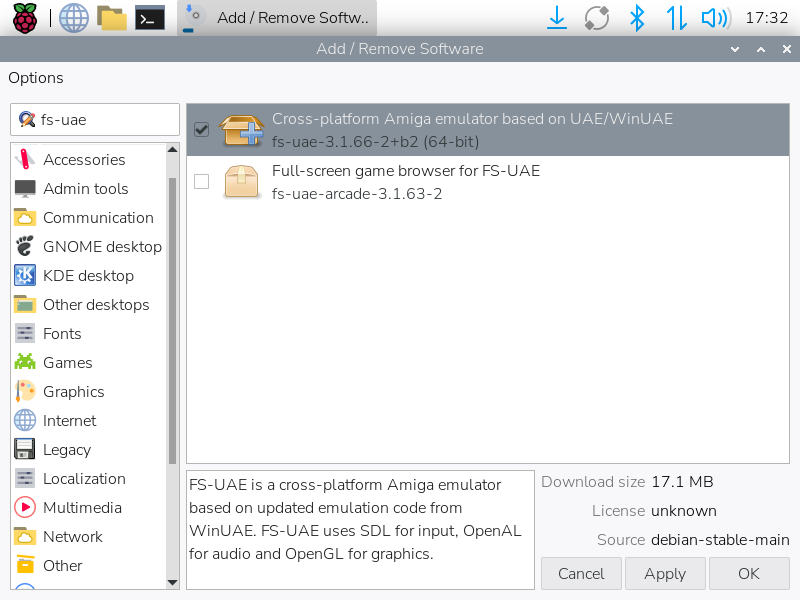
Click on OK button on the bottom to install selected packages. You may be prompted for your password.
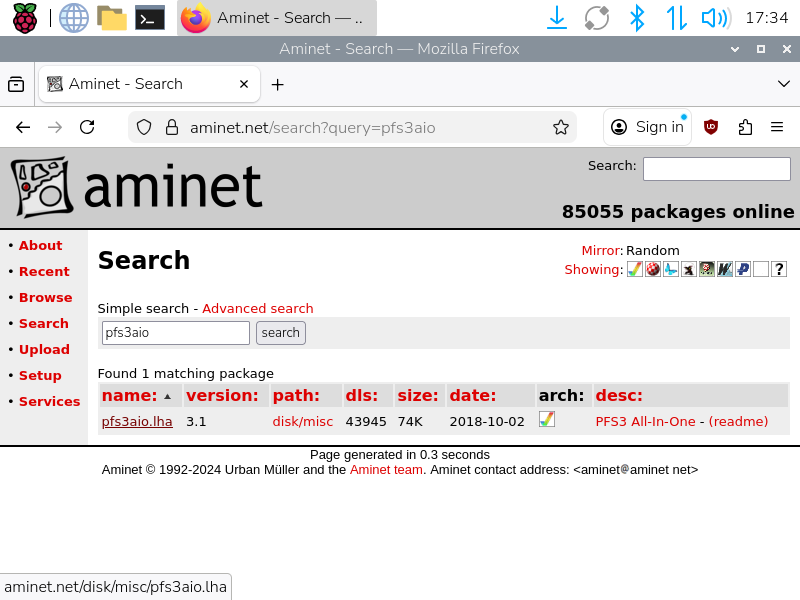
For creating PFS3 partitions, we’ll need pfs3aio. Open your web browser,
go to Aminet search page and download
pfs3aio.lha archive.
Open Downloads folder, right click on the archive and select “Extract Here” option.
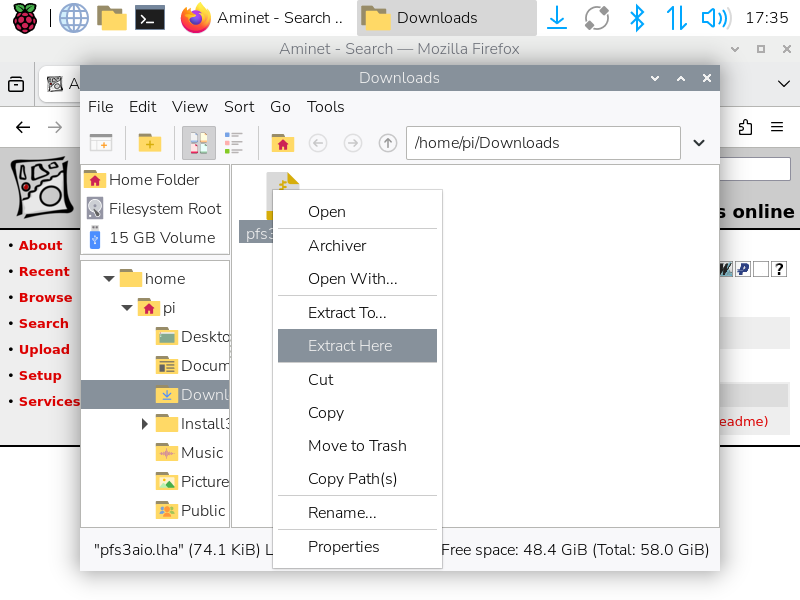
Close all windows.
Step 1 - Creating Partitions
Launch GParted from the menu (System Tools -> GParted).
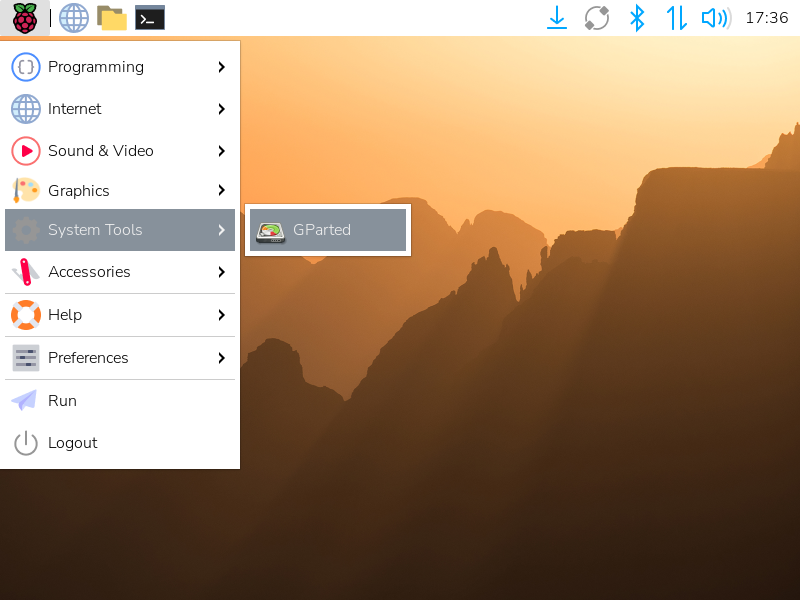
Enter your password if prompted.
Gparted window will open with your main disk shown (whether it is SD Card or USB drive). Remember, or write down the device name of your main disk, as you will need to avoid it later.
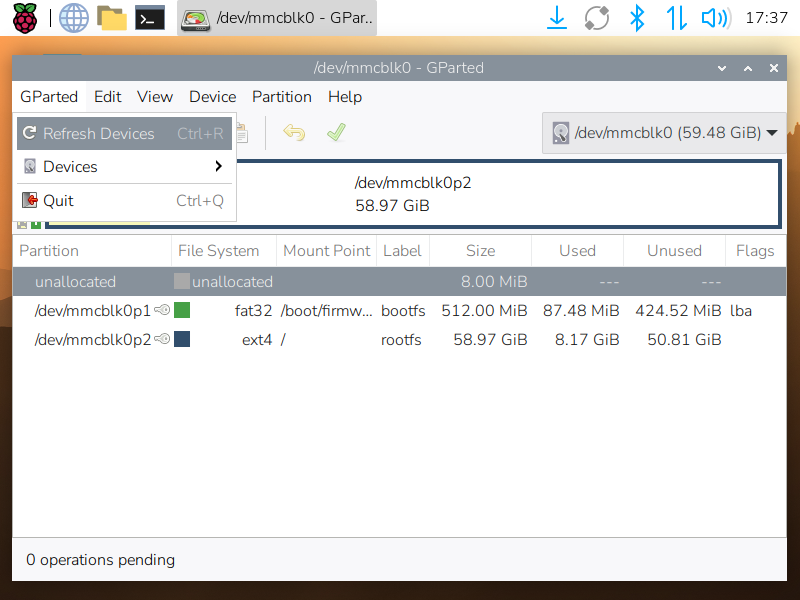
Insert your microSD card in the card reader to USB port.
Select “Refresh devices” from GParted menu, or just hit
Ctrl-R. Select the new device from the dropdown list on the top right corner of
the window (e.g., /dev/sda). It must NOT be the same device as your OS disk.

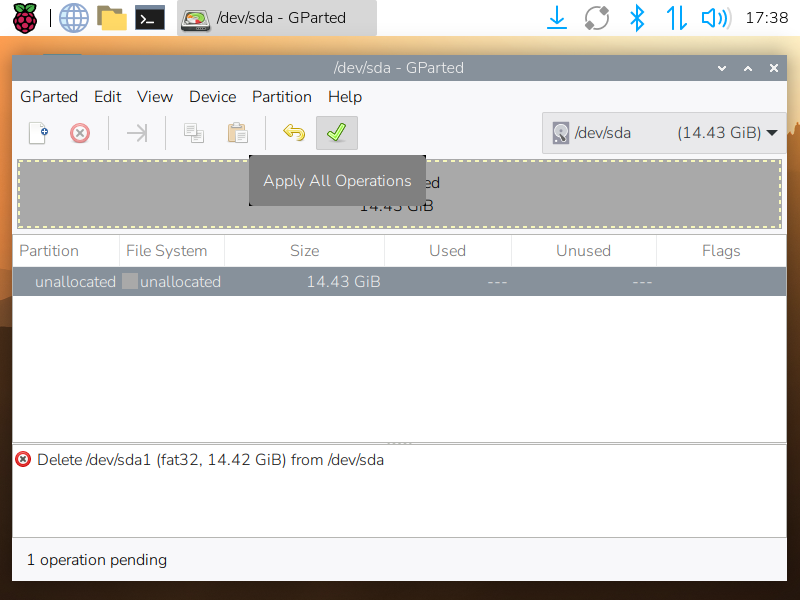
Right click on each partition and select “Delete” option.

Click on the green checkmark button on the toolbar to apply the changes.
Right click on the unallocated space and select “New” option. In the dialog set the following parameters:
- Create as: Primary Partition
- File system: fat32
- New size: 100 MiB
- Align to: MiB
Click “Add”.

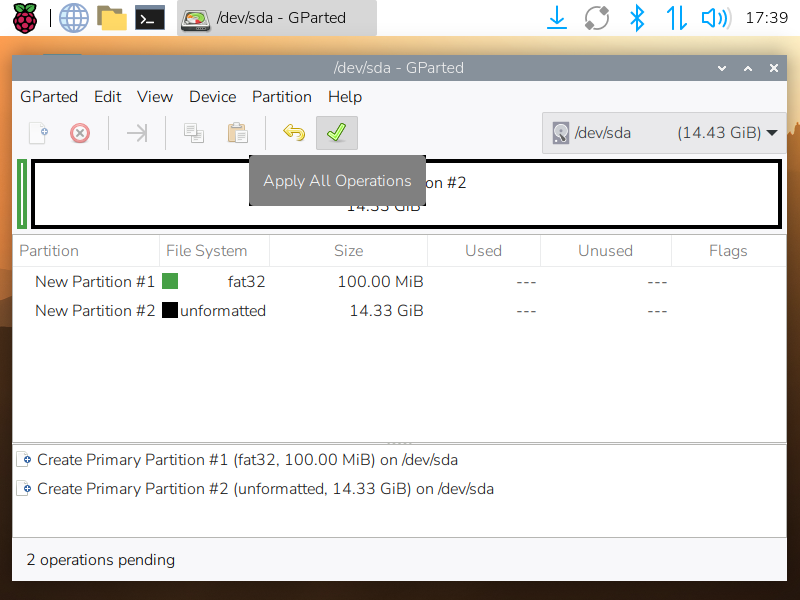
Right click on the remaining unallocated space and select “New” option again. In the dialog set the following parameters:
- Create as: Primary Partition
- File system: unformatted
- Align to: MiB
Click “Add”.

Click on the green checkmark button on the toolbar to apply the changes.
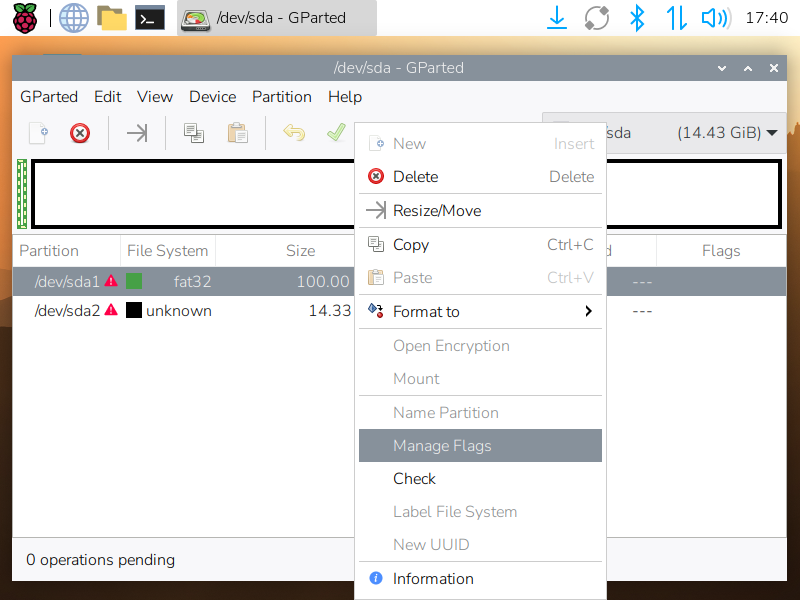
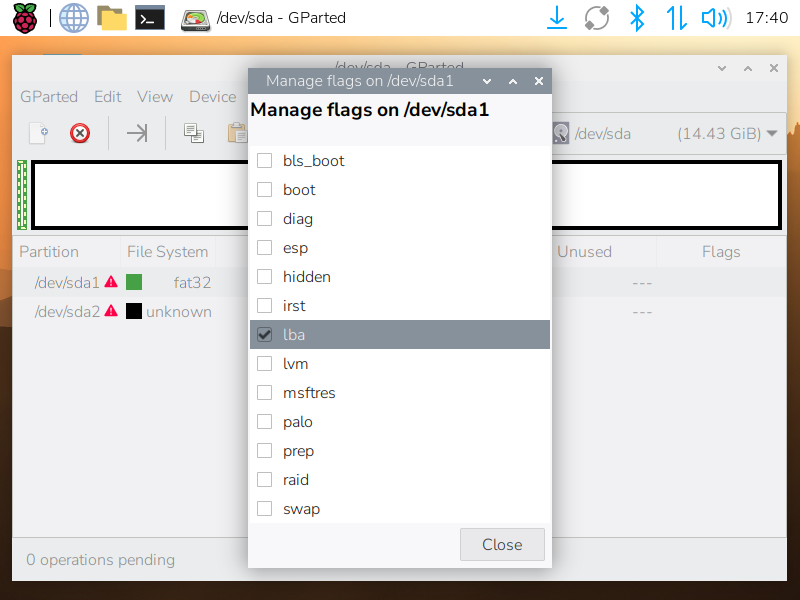
Right-click the first partition and select Manage Flags. Check lba.
Close GParted application.
Unfortunately, GParted does not support setting partition type to 0x76. It
can be done from terminal by using command line tool fdisk.
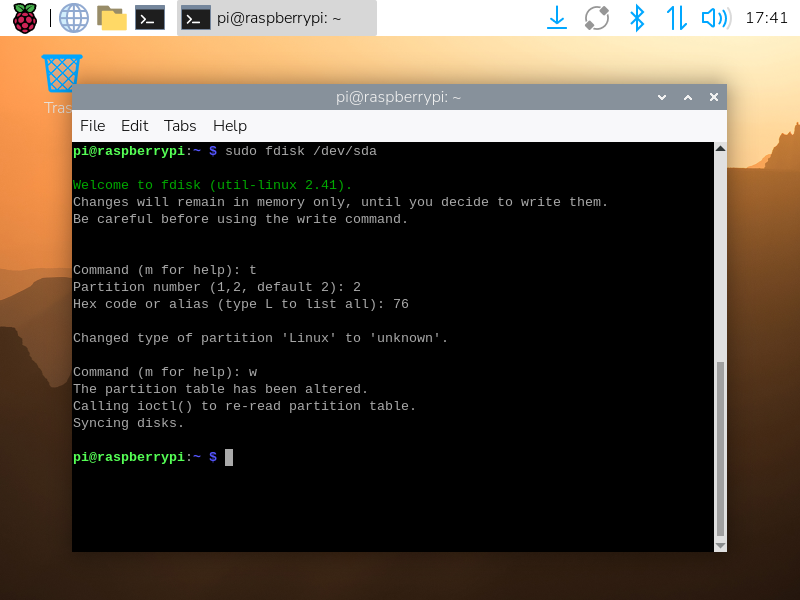
Open terminal window, and type the following command:
pi@raspberrypi:~$ sudo fdisk /dev/sda
In the fdisk prompt, type the following commands to set partition type:
t
2
76
w
Close the terminal window.
This will set type (t) of second partition (2) to 0x76 (76) and
write (w) changes to the disk and exit. The 0x76 partition type is
required for the Amiga to see this partition as a hard drive. Omitting this step
will result in AmigaOS not recognizing this partition as the hard drive.
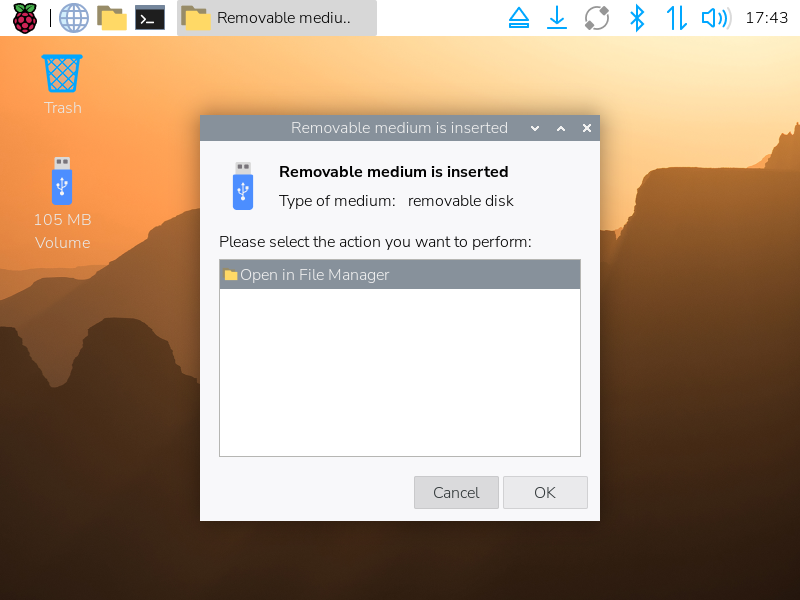
Remove and re-insert card reader again. Dialog will open asking what to do with the newly inserted device. Close the dialog, or click Cancel button. Blue icon with the pendrive image should appear on the desktop.
Step 2 - Prepare Emu68 boot files
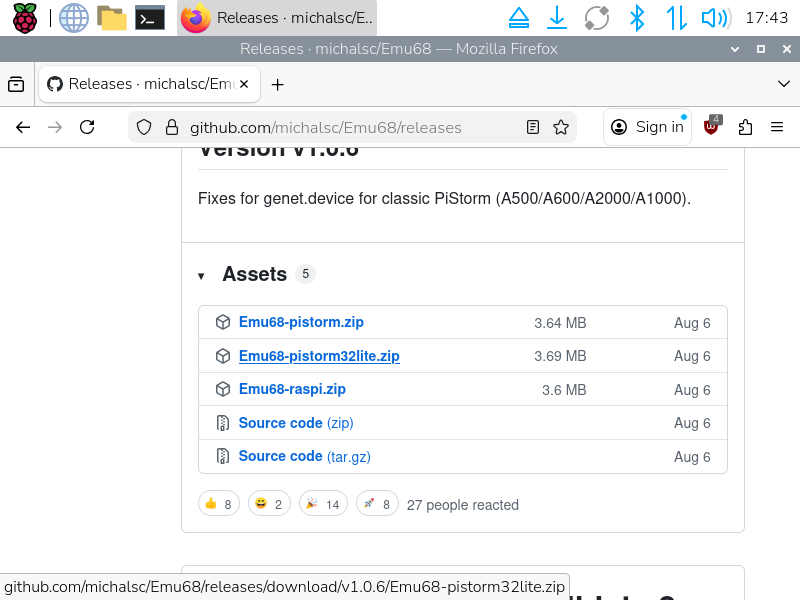
Open browser and go to Emu68 releases page. Scroll down to Assets and download latest Emu68 proper for your PiStorm.
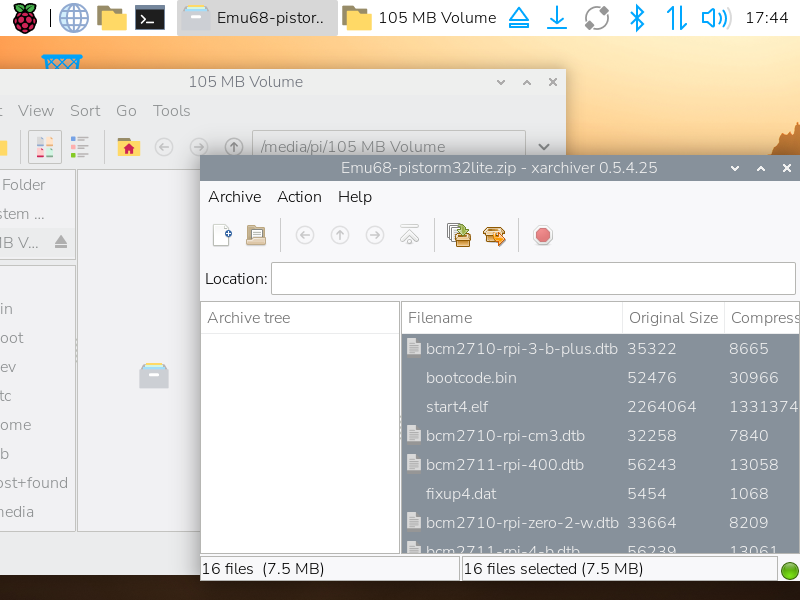
Open Downloads folder, double click on the downloaded zip file to open Xarchiver. Close all windows, but the Xarchiver. Double click on pendrive icon on the desktop to open it. Go back to Xarchiver window and select all files. Drag selected files and drop them to the pendrive window.
Copy Kickstart to the pendrive.
Double click on the config.txt file on the pendrive to open it in text
editor. Make sure it have the line:
initramfs kick.rom
where kick.rom is the name of your kickstart image file - in this case it’s
A1200.47.115.rom. You may also adjust other settings in this file. Finally,
save the file and close the text editor.
Step 3 - Configure and run FS-UAE emulator
To partition newly created Amiga disk, FS-UAE emulator will be used. It needs minimal configuration which will be created in few next steps.
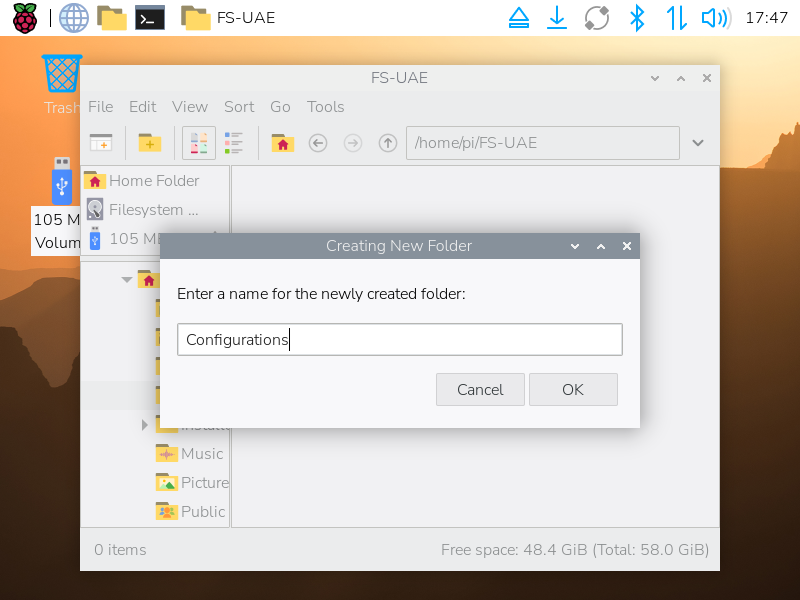
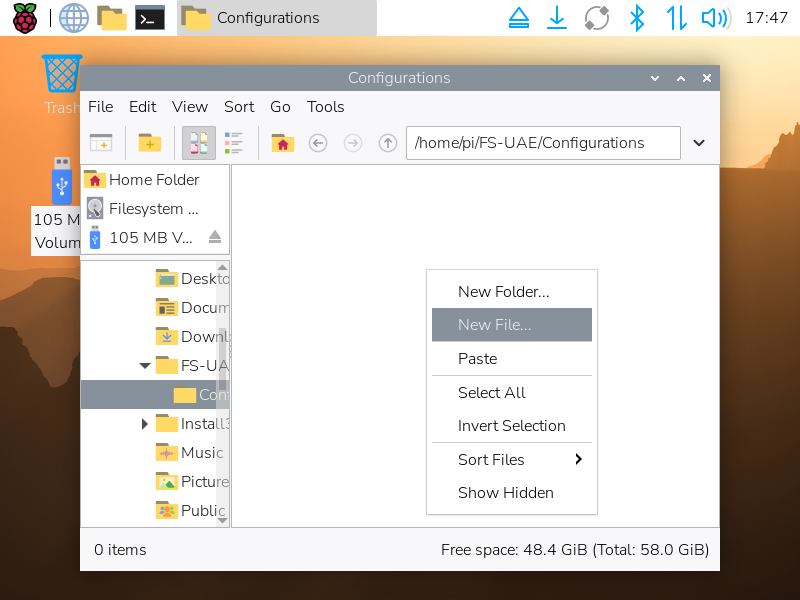
First, open file manager, create directory FS-UAE in your
home directory, if it does not exist yet. Next, create subdirectory
Configurations inside it.
Finally, create new file and name it Default.fs-uae inside
FS-UAE/Configurations directory, and then double click it to edit.
Fill it with the contents:
[config]
amiga_model = A1200/020
fast_memory = 8192
kickstart_file = $HOME/A1200.47.115.rom
floppy_drive_0 = $HOME/Install3.2.adf
floppy_drive_speed = 800
floppy_drive_volume = 0
hard_drive_1_controller = ide0
hard_drive_1 = /dev/sda2
hard_drive_2 = $HOME/Downloads
Review the file and make sure paths to kickstart and installation media are correct. Also, make sure to use correct device name for your microSD card for the hard drive. Note, that using second partition is not a mistake. Save and close the text editor.
Open terminal window, execute chown command to change ownership of the
device to your user:
pi@raspberrypi:~$ sudo chown pi:pi /dev/sda2
If your username is different from pi, please adjust the command
accordingly. Close terminal window.
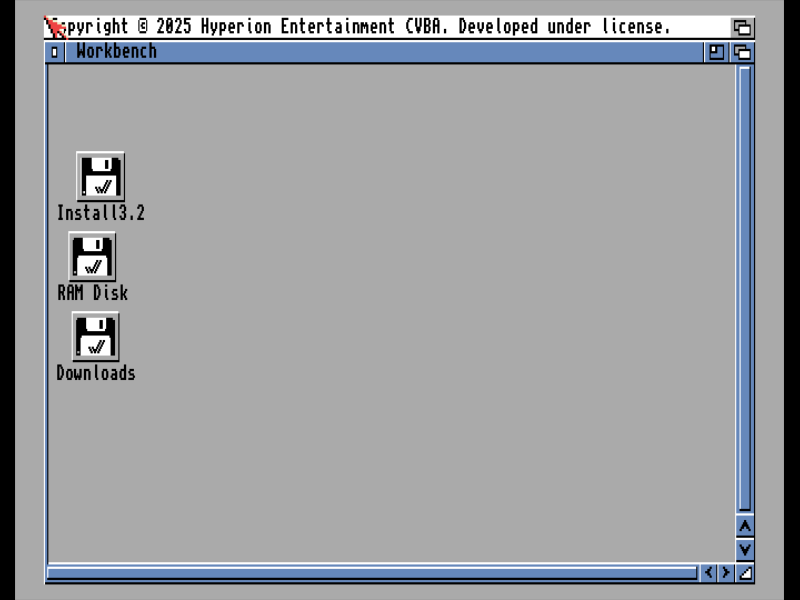
Now, run FS-UAE from the main menu (Run -> type fs-uae and hit enter), and
wait till floppy with installer boots. You may switch to fullscreen mode by
pressing F12 + F keys.
Step 4 - Add PFS As Known File System
You should see AmigaOS screen.
Before launching HDToolBox, copy PFS3 file to RamDisk for easier access.
For that, open Downloads disk, select “Window -> Show -> All files”, and
locate pfs3aio. Drag it to RamDisk icon on the desktop.
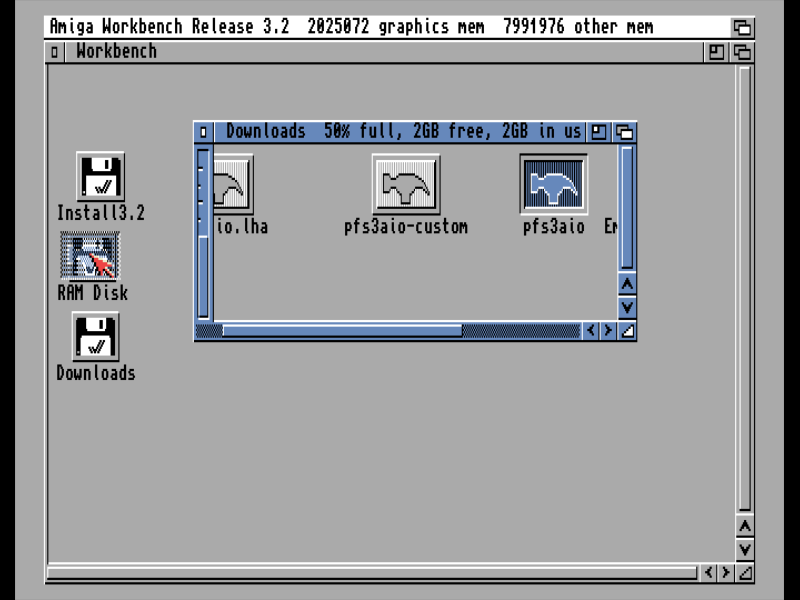
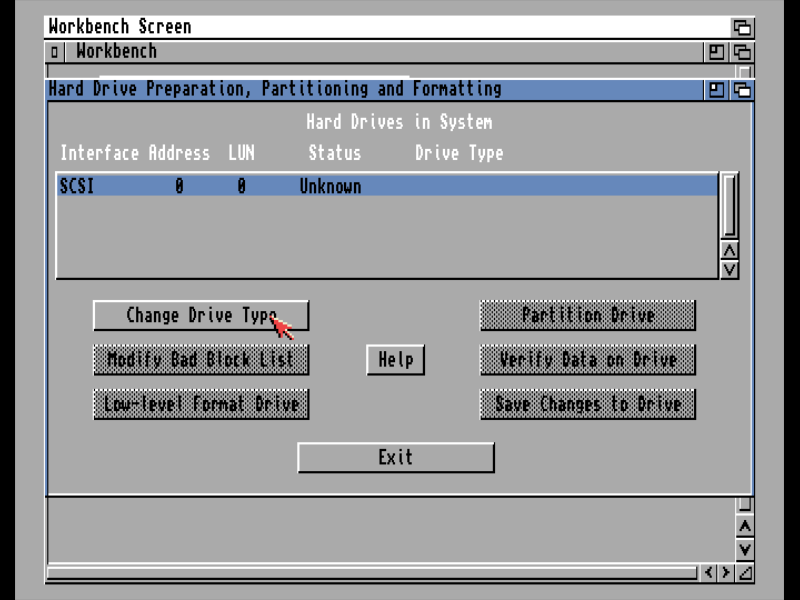
Close the window, and open on Install3.2 disk (or whatever is the name of your installation media). Locate HDToolBox utility and launch it.
You should see the hard drive detected by HDToolBox. Click “Change Drive Type”
button.
Then click “Define New…” button
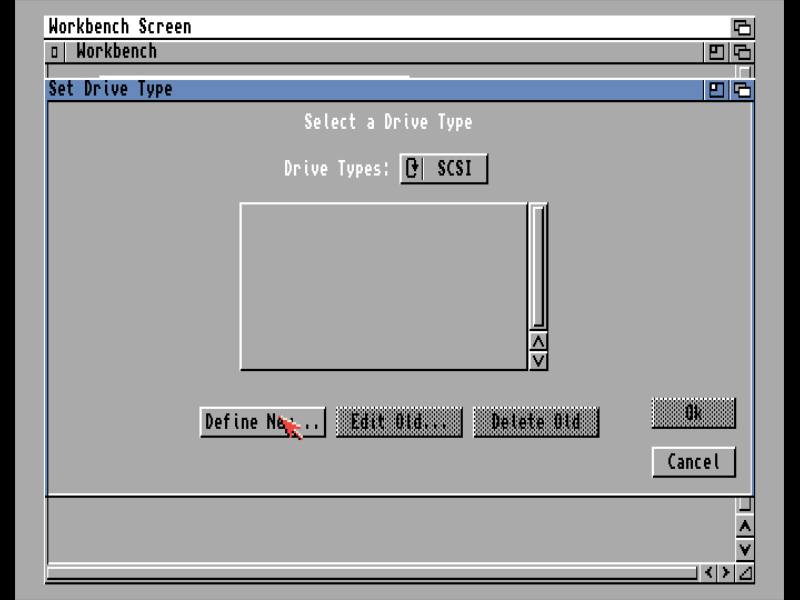
And finally “Read Configuration” button.
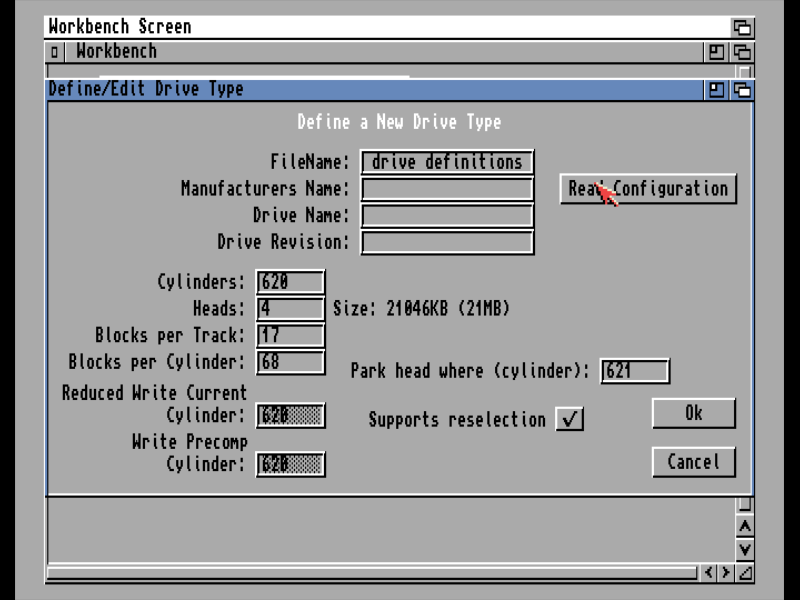
Click “Ok”.
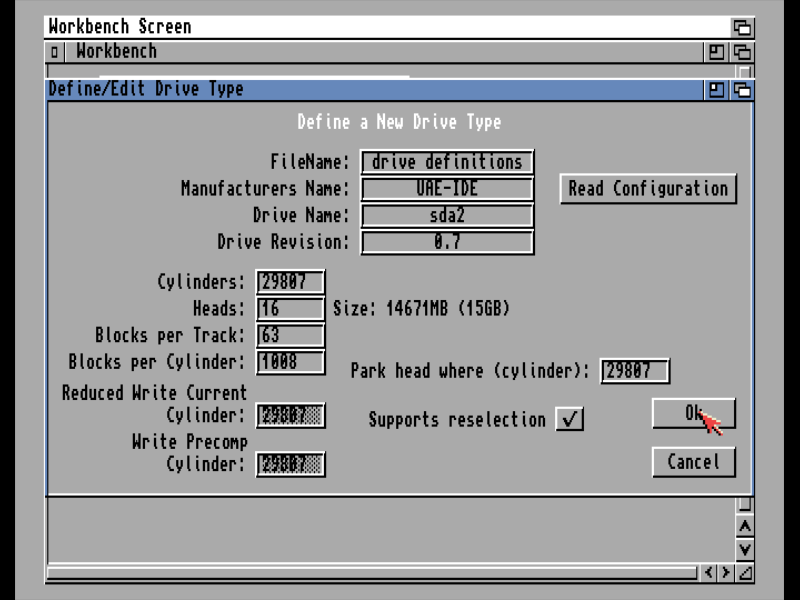
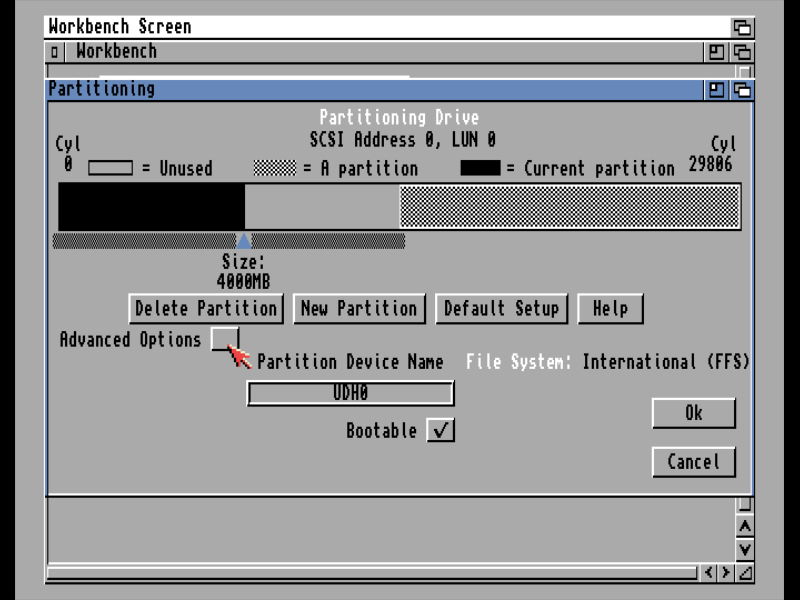
Click on “Partitioning Drive”
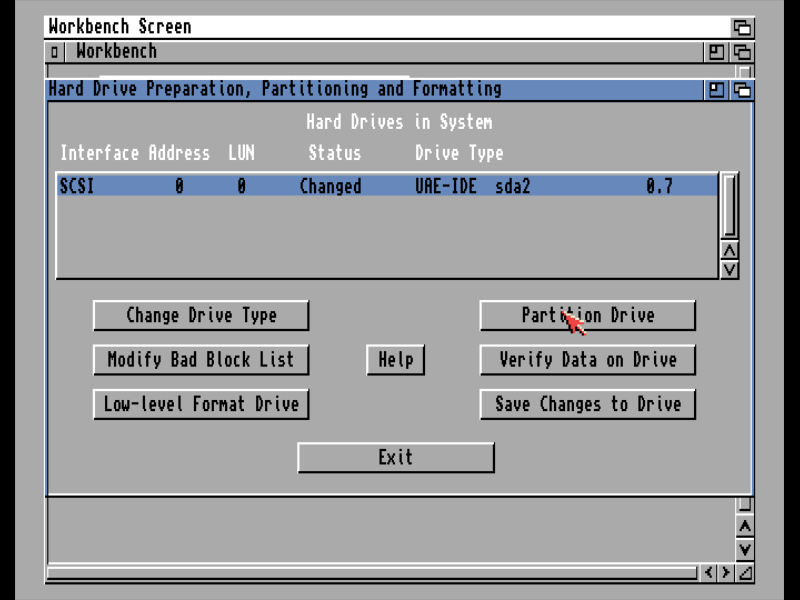
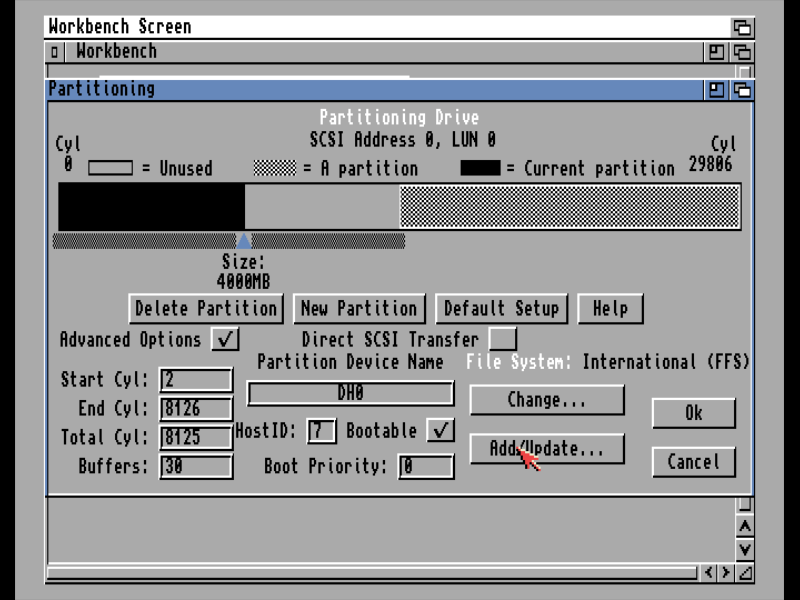
On Partitioning window select “Advanced Options…” checkbox.
Click on “Add/Update…”.
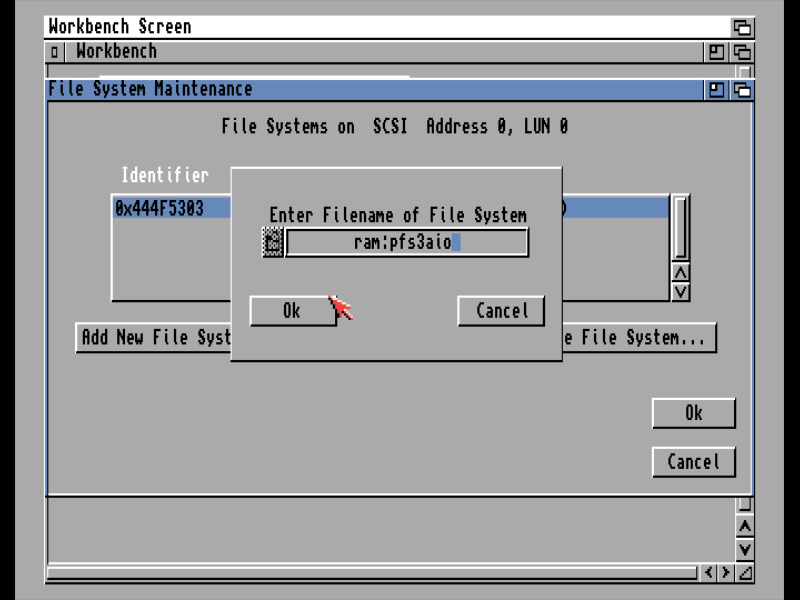
In the dialog which opens, click on “Add New File System…” button.

Remove existing entry in dialog box, and type ram:pfs3aio, then click “Ok”.
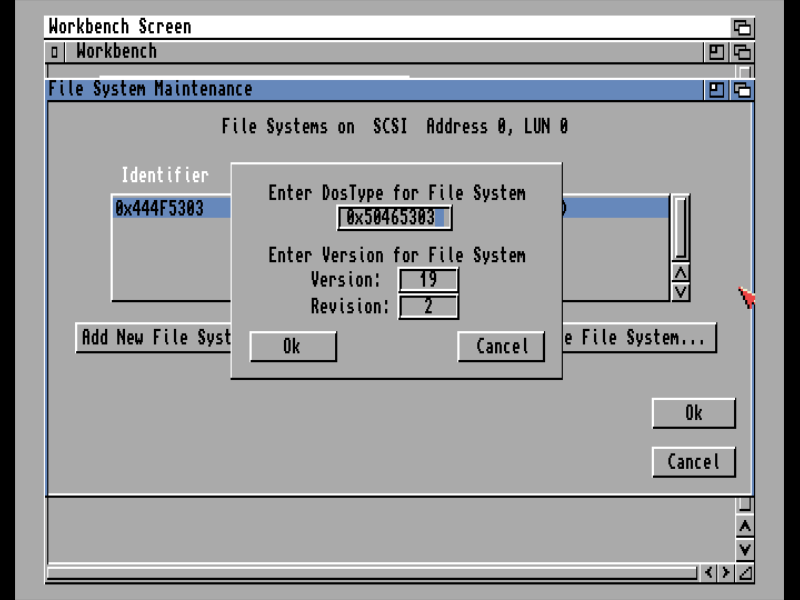
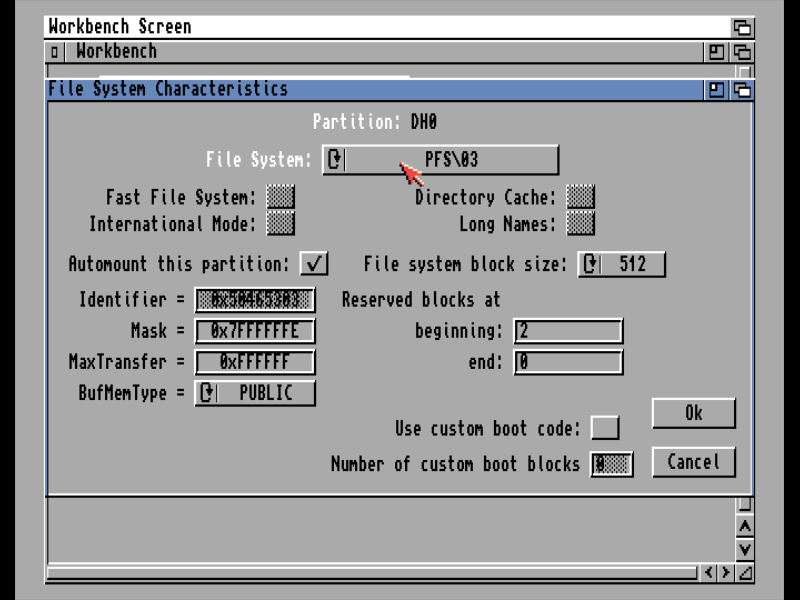
Replace existing DosType for File System with 0x50465303 (which is
PFS\03 in hexadecimal notation) and click “Ok” and “Ok” to close “File
System maintenance” dialog.
Step 5 - Defining partitions
Select first partition and click “Change…”.
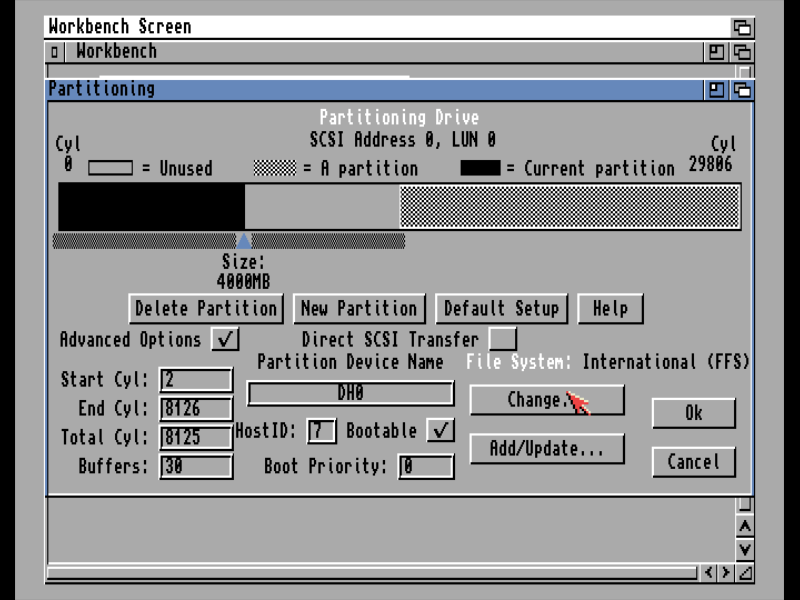
In the dialog which opens, set File System to “PFS\03”, and press “Ok”.
Adjust name and size of the partition as you wish, and proceed similarly for the second partition, i.e:
- select/create next partition
- adjust its size and name
- click “Change…”
- set File System to “PFS\03” and click “Ok”
Click “Ok” when done to close Partitioning window.
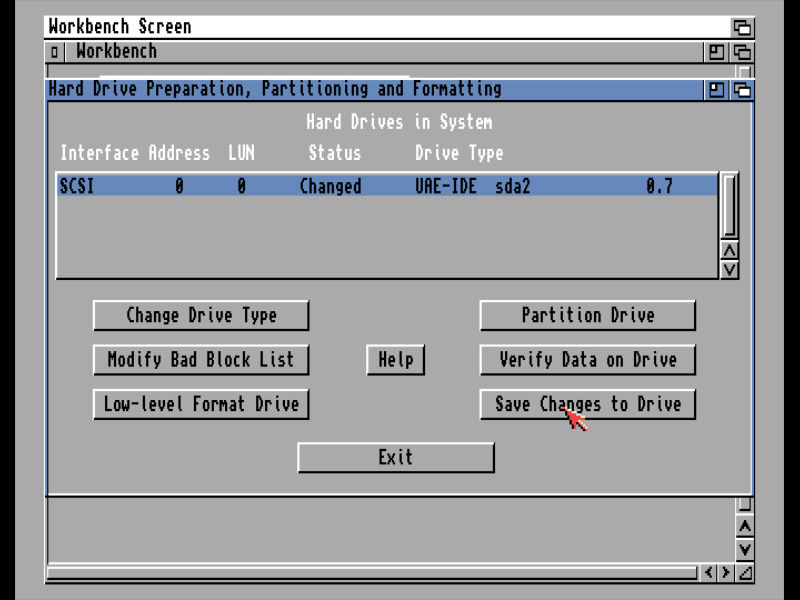
Click on “Save Changes to Drive” button to write partition table to the disk, and then click “Exit” button to leave HDToolBox.
You should see AmigaOS desktop again, with two new icons representing partitions. Click on the one labeled “DH0:Uninitialized” and select “Format Disk…” from the “Icons” menu. Set the Volume Name as you wish (that suppose to be smaller, bootable partition with AmigaOS), and click on “Quick Format” button. Proceed similarly for the second partition.
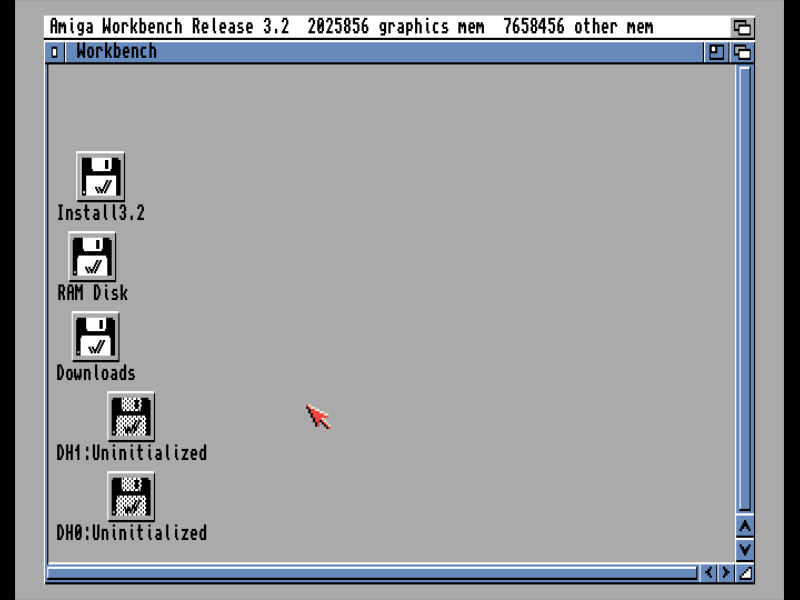
Done! Now you can proceed with AmigaOS installation on the newly created partitions, or just copy your existing AmigaOS installation.
Hit F12+q when done to quit FS-UAE emulator.
Advanced Linux users
If you are a Linux power user, installation is pretty much straightforward.
Again, in this example microSD card will be connected through USB card reader an
will be identified as /dev/sda device. Please make sure you have identified
the correct device, otherwise you may destroy your data irreversibly.
To identify the device, you may use lsblk command before and after inserting
the card. The new device which appears is your microSD card.
Step 1 - Install needed tools
There will be needed two packages to install:
lhasa- for extracting LHA archivesfs-uae- for emulating Amiga to format partitions
pi@raspberrypi:~ $ sudo apt update
pi@raspberrypi:~ $ sudo apt install lhasa fs-uae
Step 2 - Create partitions
To partition microSD card parted tool will be used. First partition will be
a small FAT32 partition for Emu68 boot files, the second one will be a large
partition of type 0x76 which serve as an Amiga disk for further
partitioning.
WARNING! All data on the card will be destroyed irreversibly! Make sure you have selected correct device!
First of all, insert your microSD card in the card reader, and connect it to computer. If there is any usable partition (like FAT32 or ext4) on the card, it may be auto-mounted by the system. If so, unmount it now:
pi@raspberrypi:~ $ df -h
Filesystem      Size  Used Avail Use% Mounted on
udev            3.9G     0  3.9G   0% /dev
tmpfs           1.6G   15M  1.6G   1% /run
/dev/mmcblk0p2   58G  7.2G   49G  13% /
tmpfs           4.0G  480K  4.0G   1% /dev/shm
tmpfs           5.0M   48K  5.0M   1% /run/lock
tmpfs           1.0M     0  1.0M   0% /run/credentials/systemd-journald.service
tmpfs           4.0G   16K  4.0G   1% /tmp
/dev/mmcblk0p1  510M   86M  425M  17% /boot/firmware
tmpfs           806M  256K  806M   1% /run/user/1000
tmpfs           1.0M     0  1.0M   0% /run/credentials/getty@tty1.service
tmpfs           1.0M     0  1.0M   0% /run/credentials/serial-getty@ttyAMA10.service
/dev/sda1        15G  8.0K   15G   1% /media/pi/2D2B-9A47
pi@raspberrypi:~ $ sudo umount /dev/sda1
Run parted command to create partitions:
pi@raspberrypi:~ $ sudo parted --script -a optimal -- /dev/sda \
    mklabel msdos \
    mkpart primary 1MiB 100MiB \
    mkpart primary 100MiB -2048s \
    type 1 0xC \
    type 2 0x76 \
    print
Model: Samsung uSD Card Reader (scsi)
Disk /dev/sda: 15.5GB
Sector size (logical/physical): 512B/512B
Partition Table: msdos
Disk Flags:

Number  Start   End     Size    Type     File system  Flags
 1      1049kB  105MB   104MB   primary  fat32        lba
 2      105MB   15.5GB  15.4GB  primary
Create FAT32 filesystem on the first partition:
pi@raspberrypi:~ $ sudo mkfs.vfat -F 32 /dev/sda1
mkfs.fat 4.2 (2021-01-31)
Go to Emu68 releases page and download latest Emu68 appropriate for your PiStorm and Amiga model. Here Emu68 for PiStorm32 Lite is used as an example in version 1.0.6 at the time of writing this guide. Unzip it on the mounted FAT32 partition:
pi@raspberrypi:~ $ wget -q https://github.com/michalsc/Emu68/releases/download/v1.0.6/Emu68-pistorm32lite.zip
pi@raspberrypi:~ $ sudo mount /dev/sda1 /mnt -o uid=pi,gid=pi
pi@raspberrypi:~ $ unzip ~/Emu68-pistorm32lite.zip -d /mnt
When mounting make sure you double checked username and group for main user on
your system. Here it is pi.
Now, copy to /mnt/ kickstart image from your Amiga/installation media and
edit with any text editor (by default there is vi and nano available)
/mnt/config.txt to include line:
pi@raspberrypi:~ $ cp A1200.47.115.rom /mnt/
pi@raspberrypi:~ $ nano /mnt/config.txt
Make sure it have the line:
initramfs A1200.47.115.rom
where A1200.47.115.rom is the name of your kickstart image file.
Review config file for further settings you may want to adjust, save config file
and finally unmount the FAT32 partition:
pi@raspberrypi:~ $ sudo umount /mnt
Step 3 - prepare Amiga partitions
Assumption for this step is that PFS3 type partitions will be used. For that, you’ll need do download pfs3aio from Aminet and extract it.
pi@raspberrypi:~ $ wget -q https://aminet.net/disk/misc/pfs3aio.lha
pi@raspberrypi:~ $ lha x pfs3aio.lha
pfs3aio - Melted   :  oooooooo
pfs3aio-custom  - Melted   :  oooooooo
To partition drive, rdbtool from
amitools package will be used. To ease
the task of creating environment for amitools and access microSD device,
elevated privileges will be used.
pi@raspberrypi:~ $ sudo su -
root@raspberrypi:~# python3 -m venv /tmp/venv
root@raspberrypi:~# source /tmp/venv/bin/activate
(venv) root@raspberrypi:~# pip install amitools
Collecting amitools
  Using cached amitools-0.8.0-py3-none-any.whl
Installing collected packages: amitools
Successfully installed amitools-0.8.0
There will be two PFS3 partitions created on the second partition of the card.
First partition will be 4GB in size for Workbench and tools, second one will use
the rest of the space. Again, correct path to the pfs3aio file if your regular
user name is different from pi.
(venv) root@raspberrypi:~# rdbtool /dev/sda2 init + \
    fsadd /home/pi/pfs3aio dostype=PFS3 + \
    add size=4Gib bootable=true bootable=true dostype=PFS3 + \
    fill + \
    change 1 dostype=PFS3 + \
    info
creating: 'DH0' (1, 16384) PFS3
creating: 'DH1' (16385, 58683) DOS3
BlockDevice:                0    58683    30046208   14Gi  heads=16 sectors=32 block_size=512
PhysicalDisk:               0    58683    30046208   14Gi  heads=16 sectors=32 block_size=512
LogicalDisk:                1    58683    30045696   14Gi  rdb_blks=[0:511,#512] used=[hi=124,#125] cyl_blks=512
Partition: #0 'DH0'         1    16384     8388608  4.0Gi   27.92%  PFS3/0x50465303  auto  boot(0)
                                                                      blk_longs=128, sec/blk=1, surf=16, blk/trk=32
                                                                      fs_block_size=512
                                                                      max_transfer=0xffffff
                                                                      mask=0x7ffffffe
                                                                      num_buffer=30
                                                                      pre_alloc=0
                                                                      boot_blocks=0
                                                                      bootable=1 pri=0
                                                                      automount=1
Partition: #1 'DH1'     16385    58683    21657088   10Gi   72.08%  PFS3/0x50465303  auto
                                                                      blk_longs=128, sec/blk=1, surf=16, blk/trk=32
                                                                      fs_block_size=512
                                                                      max_transfer=0xffffff
                                                                      mask=0x7ffffffe
                                                                      num_buffer=30
                                                                      pre_alloc=0
                                                                      boot_blocks=0
                                                                      bootable=0
                                                                      automount=1
FileSystem #0 PFS3/0x50465303 version=19.2 size=59120 seg_list_blk=0x2 global_vec=0xffffffff
(venv) root@raspberrypi:~# deactivate
root@raspberrypi:~# rm -fr /tmp/venv
root@raspberrypi:~# exit
Step 4 - format Amiga partitions
To format PFS3 partitions FS-UAE emulator will be used.
Create configuration for FS-UAE in your home directory if it doesn’t exists:
pi@raspberrypi:~ $ mkdir -p FS-UAE/Configurations
pi@raspberrypi:~ $ cat > FS-UAE/Configurations/Default.fs-uae <<EOF
> [config]
> amiga_model = A1200/020
> fast_memory = 8192
> kickstart_file = $HOME/A1200.47.115.rom
> floppy_drive_0 = $HOME/Install3.2.adf
> floppy_drive_speed = 800
> floppy_drive_volume = 0
> hard_drive_1_controller = ide0
> hard_drive_1 = /dev/sda2
> EOF
Double check installation media (or just Workbench ADF image) and kickstart paths.
Change owner of the Amiga partition to the user:
pi@raspberrypi:~$ sudo chown pi:pi /dev/sda2
Run fs-uae from menu, or terminal. Now, you should see two uninitialized
disks - DH0 and DH1. Click DH0, select ‘Icons -> Format Disk…’, set volume
name and click on ‘Quick Format’ button. Proceed similarly for DH1.
That’s it.
When done, hit F12 + Q to quit FS-UAE, or proceed with AmigaOS installation on
the newly created partitions.